2FA Instructions for Google and Microsoft
How to install Microsoft Authenticator
1. Open the Microsoft Authenticator app on your phone.
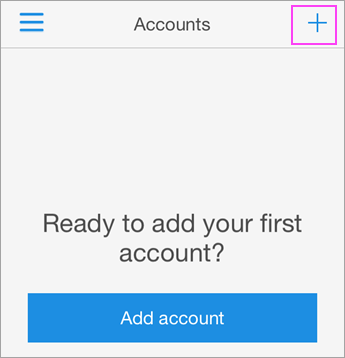
2. Tap the + icon and choose Personal or Work account.
3. Use your phone to scan the QR square that is on your computer screen.
4. iPhone users may have to enable the camera in Settings to scan.
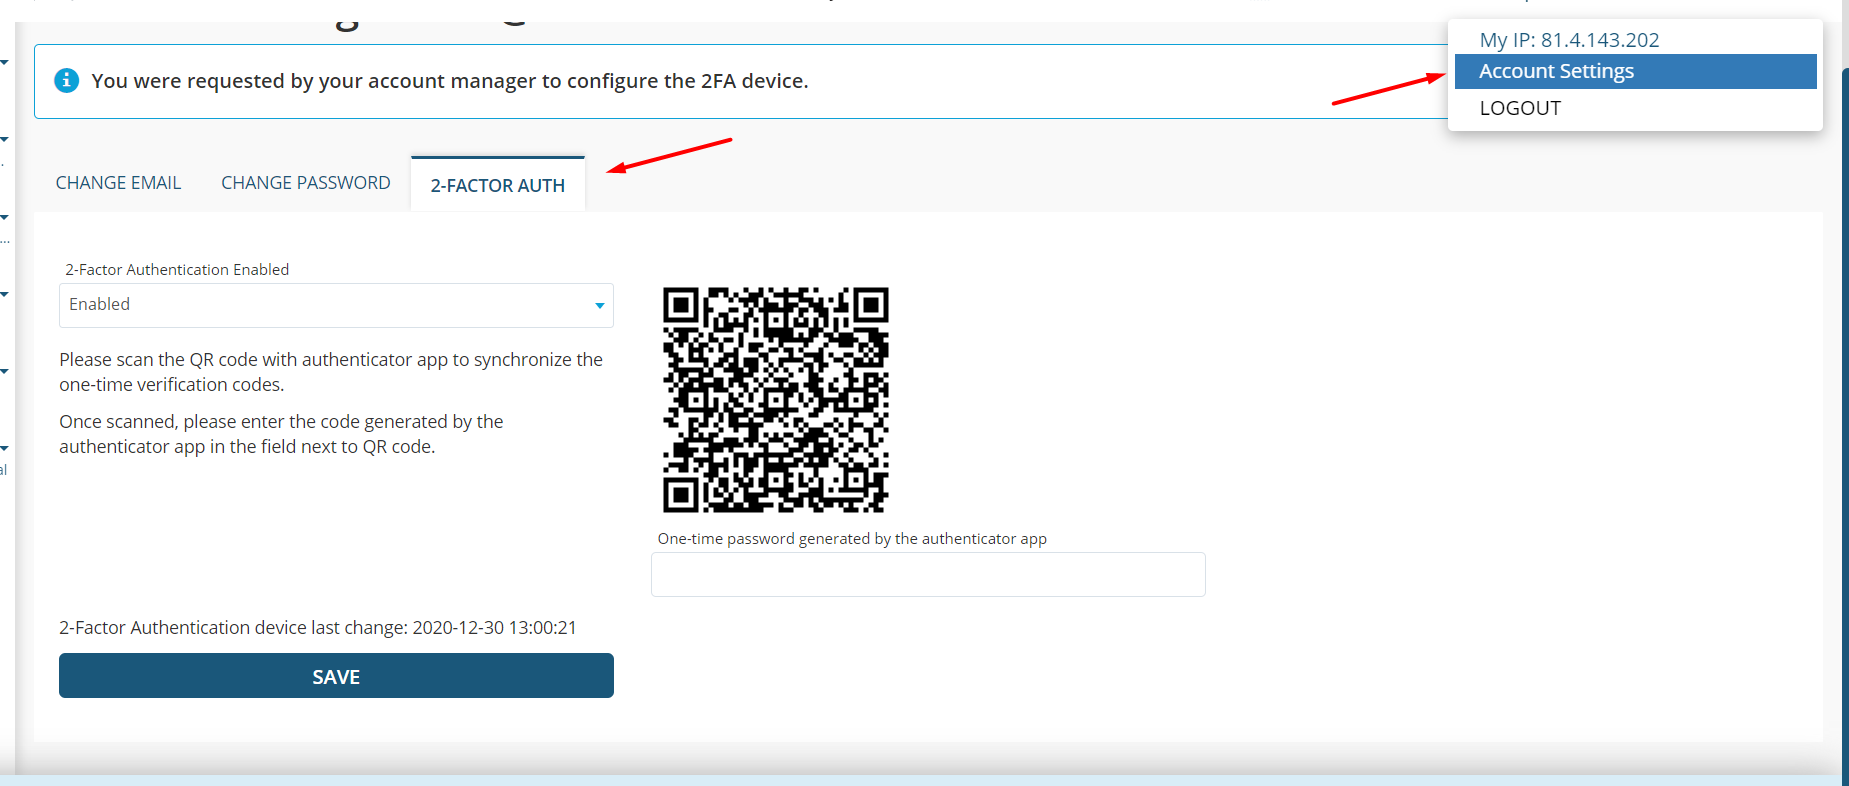
5. Go to your “Account Settings” on Atlas then to “2-Factor-Auth” tab. Change the status to enabled and scan the code via your Microsoft Authenticator app on your device.
6. Click on “Scan barcode” to scan QR code displayed on your Atlas account. Once you scan the QR code, you will see a 6 digit code under “Praxis Cashier Atlas” ([email protected]) on your Microsoft Authenticator app. Enter that code to Atlas to enable the option and click on “Save”.
How to move Microsoft Authenticator to a New Phone
Turn on the Backup Option on Your Old Phone
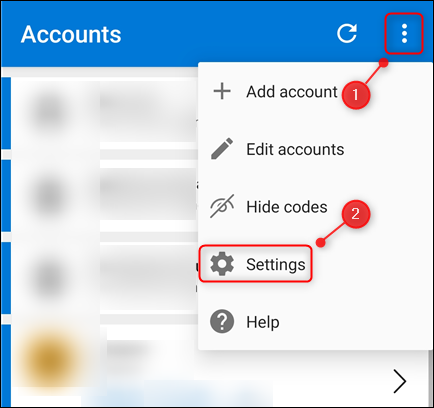
If you need to recover your accounts on a new phone, you will have to turn on the backup option on your old one. To do this, open Microsoft Authenticator. Tap the three vertical dots at the top right, and then tap “Settings.”
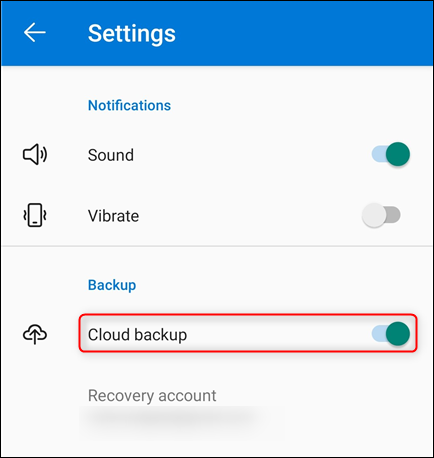
In the “Backup” section, toggle-On “Cloud Backup” on an Android phone, or “iCloud Backup” on an iPhone.
Your accounts will then be backed up to the Microsoft account you used when you first set up Microsoft Authenticator. iPhones also require that you have an iCloud account.
If you are concerned about what’s actually backed up, it’s pretty straightforward. Your account and usernames, verification code, and various metadata, such as the time at which the backup was created, will all be included.
Using the Recovery Option on Your New Phone
Next, you will need to install Microsoft Authenticator on your new phone. Download it from the Google Play for Android or the Apple App Store for iPhone. Do not set up any accounts using Microsoft Authenticator until after you have used the Recovery tool because it will overwrite matching site accounts.
For example, say you set up 2FA on the Gmail account [email protected] in Authenticator on your new phone. However, Authenticator on your old phone contains the Gmail account [email protected]. The Recovery tool will overwrite the [email protected] account you added to Authenticator on your new phone with the [email protected] account that exists in your backup.
To use the Recovery tool, open Microsoft Authenticator on your new phone, and then click “Begin Recovery.”
You will be asked to sign into the Microsoft account you used for the backup on your old phone. Your accounts will then automatically be added to Microsoft Authenticator on your new one.
Revalidate on the New and Remove from the Old
Some accounts will require you to revalidate, either by signing into those accounts or scanning a QR code. Microsoft Authenticator will display a message if you need to do this. It is essentially the same process you went through when you set up the account originally.
It is also important to remove the accounts from your old phone. However, do not do this until you have tested and made sure you can access these accounts on your new phone via Microsoft Authenticator.
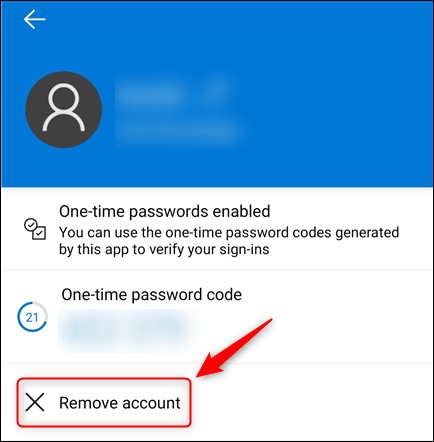
To remove an account from your old phone, open Microsoft Authenticator on it. Tap the account you want to remove, and then tap “Remove Account.”
You should also open all your 2FA accounts and see if your old phone is still shown as a valid authentication device; if it is, remove it.
Once you have removed all the accounts from Authenticator on your old phone, you can remove the app, as well. From this point onward, only your new phone will provide 2FA codes for you.
How to install Google Authenticator
Downloading the Google Authenticator app to your mobile device1. On your iPhone, Android device or iPad, tap the App Store or Play Store icon to go to the Application Store.
2. Search for Google Authenticator.
3. Download Google Authenticator to your device. You can see the Google Authenticator logo below:

4. Go to your “Account Settings” on Atlas then to “2-Factor-Auth” tab. Change the status to enabled and scan the code via your Google Authenticator app on your device.
5. Click on “Scan barcode” to scan QR code displayed on your Atlas account. Once you scan the QR code, you will see a 6 digit code under “Praxis Cashier Atlas” ([email protected]) on your Google Authenticator app. Enter that code to Atlas to enable the option and click on “Save”.
How to move Google Authenticator to your new phone
If you are upgrading to a new phone from an old one, or from an Android device, then you need to take steps to make sure that Google Authenticator continues to work as you would expect.
Setting up the new phone
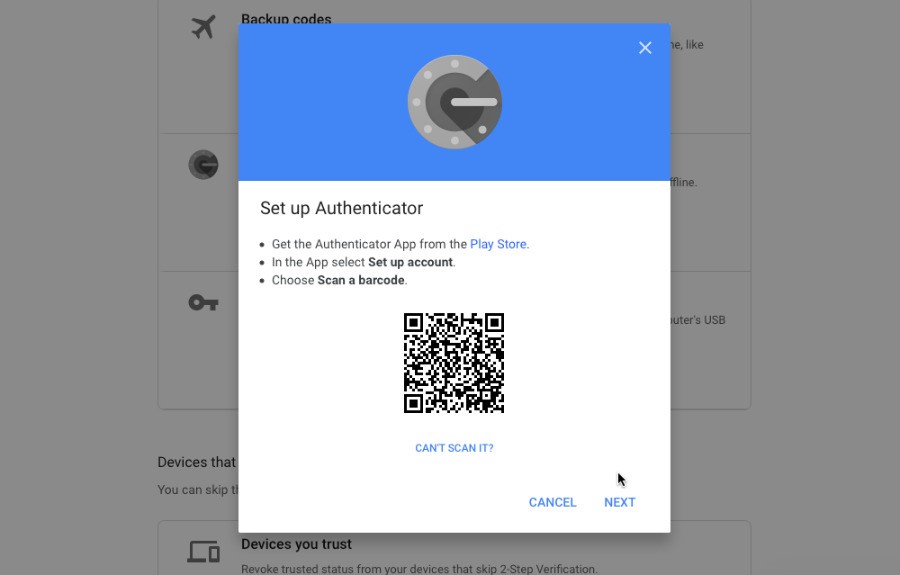
You are going to be using both the app and the online Google Authenticator service for this. Install the Google Authenticator app onto your new device. Go to myaccount.google.com and sign into your Google Account. Click on Security and then 2-Step Verification.
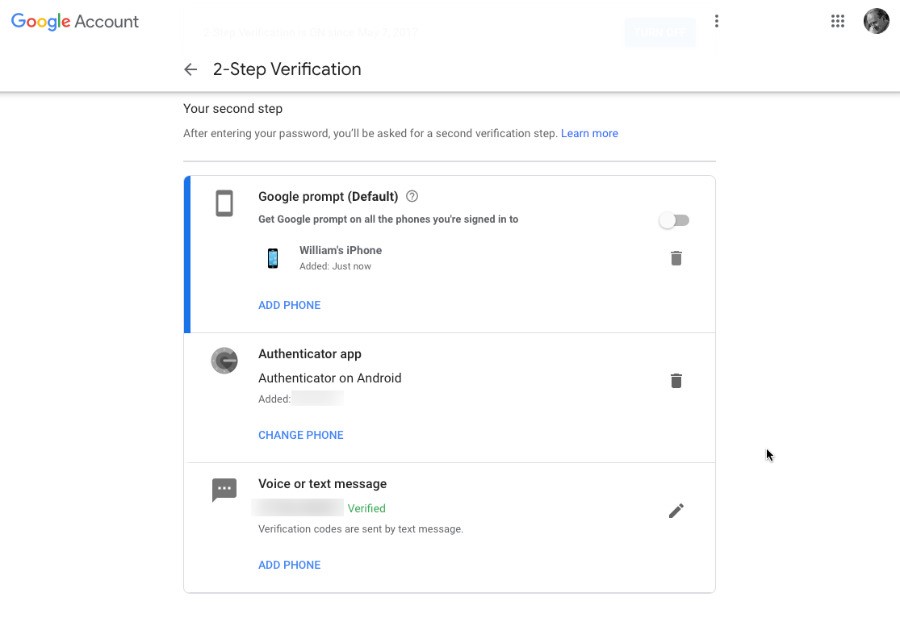
In the page that appears, you will see a section headed Authenticator app. Click on Change Phone.
This takes you through setting up your new device and will first prompt you to say whether you are using iPhone or Android. Then it will display a QR code.
Open the Google Authenticator app on your phone and click on Scan Barcode. You will have to confirm that you give permission for the app to use your camera, but when you have, point the phone at the QR code.
A new six-digit number will be generated in the app and you enter that onto the website.